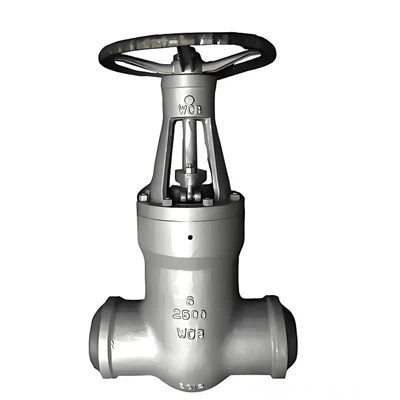
Disassembling a gate valve is a task that requires a good understanding of the valve’s structure and proper techniques. As a gate valve supplier, I’ve witnessed firsthand the importance of being able to disassemble these valves for maintenance, repair, or replacement purposes. In this blog, I’ll guide you through the step – by – step process of disassembling a gate valve. Gate Valve
Pre – disassembly Preparations
Before you start disassembling a gate valve, it’s crucial to take some preparatory steps. First, ensure that the valve is in a closed position. This prevents any fluid from flowing out during the disassembly process, which can be dangerous and messy. Next, isolate the valve from the system. This may involve shutting off the main supply of the fluid, whether it’s water, gas, or any other medium.
You’ll also need to gather the necessary tools. A set of wrenches is essential. Depending on the size and type of the gate valve, you may need adjustable wrenches, socket wrenches, or pipe wrenches. A screwdriver can also come in handy for removing any small screws or fasteners. Additionally, it’s a good idea to have a container to collect the small parts and a clean, flat surface to lay out the disassembled components.
Step 1: Removing the Bonnet
The bonnet is the part of the gate valve that covers the internal components. To remove the bonnet, start by loosening the bolts that hold it in place. These bolts are usually located around the perimeter of the bonnet. Use the appropriate wrench to turn the bolts counter – clockwise. As you loosen each bolt, be careful not to let it fall out completely, as it can be difficult to retrieve if it drops into the valve body.
Once all the bolts are loosened, carefully lift the bonnet off the valve body. You may need to give it a gentle tap or wiggle to break any seal that has formed between the bonnet and the valve body. Place the bonnet on a clean surface, and take note of the orientation of any gaskets or seals that were between the bonnet and the valve body.
Step 2: Removing the Stem and Gate Assembly
After removing the bonnet, you’ll expose the stem and gate assembly. The stem is the rod that connects the handwheel or actuator to the gate. The gate is the part that moves up and down to control the flow of fluid through the valve.
To remove the stem and gate assembly, first, disconnect the stem from the handwheel or actuator. This may involve removing a nut or a pin that holds the stem in place. Once the stem is disconnected, you can carefully lift the stem and gate assembly out of the valve body.
As you remove the stem and gate assembly, pay attention to the position of the gate within the valve body. The gate should be in the closed position when you remove it. If the gate is stuck, you may need to use a gentle tapping or a lubricant to free it up.
Step 3: Inspecting the Components
Once you have disassembled the gate valve, it’s time to inspect the components. Start by examining the gate. Look for any signs of wear, such as scratches, grooves, or corrosion. The gate should move smoothly and fit snugly within the valve body. If there are any signs of damage, the gate may need to be replaced.
Next, inspect the stem. Check for any bends, cracks, or excessive wear. The stem should be straight and able to turn freely. If the stem is damaged, it can affect the operation of the valve and may need to be replaced.
Inspect the valve body as well. Look for any signs of corrosion, pitting, or damage to the internal surfaces. The valve body should be clean and free of any debris or buildup. If there is significant damage to the valve body, it may need to be repaired or replaced.
Step 4: Cleaning the Components
After inspecting the components, it’s important to clean them thoroughly. Use a suitable cleaning agent to remove any dirt, grease, or debris from the components. You can use a brush to scrub the surfaces of the gate, stem, and valve body.
For stubborn dirt or corrosion, you may need to use a more aggressive cleaning method, such as sandblasting or chemical cleaning. However, be careful not to damage the components during the cleaning process.
Once the components are clean, dry them thoroughly. You can use a clean cloth or compressed air to remove any moisture.
Step 5: Reassembling the Gate Valve
Reassembling the gate valve is the reverse of the disassembly process. Start by placing the stem and gate assembly back into the valve body. Make sure the gate is in the closed position and that the stem is properly aligned.
Next, place the bonnet back on the valve body. Line up the bolt holes and insert the bolts. Tighten the bolts evenly, using a criss – cross pattern to ensure a proper seal. Be careful not to overtighten the bolts, as this can damage the gaskets or the valve body.
Finally, reconnect the stem to the handwheel or actuator. Make sure the connection is secure and that the handwheel or actuator can turn the stem smoothly.
Common Issues and Troubleshooting
During the disassembly and reassembly process, you may encounter some common issues. One common issue is a stuck gate. If the gate is stuck, you can try using a lubricant to free it up. Apply the lubricant to the stem and the gate, and then try to move the gate up and down.
Another issue is a leaking valve. If the valve is leaking after reassembly, check the gaskets and seals. Make sure they are properly installed and not damaged. If the gaskets or seals are damaged, replace them with new ones.
Why Choose Our Gate Valves
As a gate valve supplier, we take pride in offering high – quality gate valves that are designed for durability and performance. Our gate valves are made from the finest materials and are manufactured to the highest standards.
We offer a wide range of gate valves to meet the needs of different applications. Whether you need a gate valve for a small residential plumbing system or a large industrial pipeline, we have the right valve for you.
Our team of experts is always available to provide technical support and advice. We can help you choose the right gate valve for your application and guide you through the installation, disassembly, and maintenance processes.
Actuator If you’re in the market for gate valves or need assistance with disassembling or maintaining your existing gate valves, we encourage you to reach out to us. We’re here to help you find the best solutions for your valve needs.
References
- "Valve Handbook" by Valve Manufacturers Association
- "Industrial Valves: Selection, Installation, and Maintenance" by John Smith
Wuxi PYNOS Flow-tech Co., Ltd.
As one of the leading gate valve manufacturers and suppliers in China, we offer a wide range of products with superior quality. We warmly welcome you to buy high quality gate valve made in China here from our factory. We also accept customized orders.
Address: Sales Center: 7th Floor, No.19 Qingyuan RD, Wuxi City, Jiangsu Prov., China
E-mail: Info@pynosvalve.com
WebSite: https://www.pynosvalves.com/